MusicAlpha Upload to Google Music Beta from Linux and Chrome OS 14 May 2011
Rather pleasant update: This app works again. After some epic hackery, it now works again. Install it now, in its fully functional, redesigned glory.
Rather depressing update: This sadly no longer works. It was fun and somewhat useful while it lasted. I have no idea why it doesn’t work, and I would really appreciate if someone could find out why it fails. However, it would be a good idea to install it anyway and I guess.
Google Music Beta is a pretty cool web app, but the Music Manager sadly only works on Windows and Mac. As a Linux user who unfortunately feels neglected by the service, but still appreciative of being invited to the service a mere day after it’s announcement, I decided to do something to remedy the situation. Not to mention the irony that one can’t even upload music to the service from Google’s own Chrome OS. So MusicAlpha was born.
This project was a pretty interesting hack, so I guess I’ll try to document the process of how I made it and how it currently works. And also, for any prospective filmmakers, this story might make for an interesting abstract action movie. But for any of you who just want to install the app, click here.
Inception
I started this only days after finishing the new revision of Cloud Save, the extension that I never quite understood, but everyone else seemed to get. One part of the newest revision was adding support for Amazon’s Cloud Drive service, which does not have an established API. However, the interactions between the javascript web interface and the server are pretty simple to understand, thanks to the almighty web inspector. The only weird thing was that the actual file upload was actually conducted through Flash, which felt unnecessary but it wasn’t an insurmountable task. But it was all built on carefully learning the way of the web client.
There was one feature request for Cloud Save to enable saving to Google Music, and that’s when the idea sort of started.
The first step was to get a Google Music account, nothing surprising there. A few hours after the announcement was the first opportunity for me to access a computer, and also when I hit the “request invite” button. In a shockingly short amount of time of a mere day, I received a nice email saying that I had been invited to the service. Yay. Now the letdown of not being able to upload from Linux begins, as well as the scheming to reverse engineer it.
A few months ago, I had the idea to do something similar, but with another Google product: Google Goggles. But after hooking up the anrdoid simulator with a http proxy (Charles), and looking at the results. I was rather dismayed, but not particularly surprised by the results: all the communication was encoded using Protobuf. Protobuf, or Protocol Buffers is “Google’s data interchange format”, according to it’s Google Code project page. It’s a structured system for encoding binary data where a .proto template is already known and compiled. Protobufs are bad in much the same way minification is. There are totally justifiable reasons to minify source code, but the elimination of a useful View Source detracts from the open ideal of the web. Though protocol buffers aren’t encrypted, they are not comprehensible without a .proto file to decode them. With a lot of work, one might be able to reverse engineer a .proto file, but it’s certainly much harder than a JSON protocol.
Before I began, this was the worst fear. That everything as encoded with protocol buffers, and my attempts to mimic it would be rendered futile.
Packets
I borrowed a computer which ran Windows 7, and installed the Music Manager in hopes of deciphering the secret enigma of the great google. I needed a simple packet sniffer, and so I used nirsoft’s smartsniff. I didn’t use wireshark because it wasn’t my computer, and I didn’t want to install and download a huge app with an intimidating user interface. Smartsniff worked pretty well, and I thought I was almost there. Packet sniffers generally can’t decode https data without some MITM-esque certificate faking, and I have reason to believe that that wouldn’t work either since running the strings command on the MusicManager.exe file includes something that resembles a public key.
Anyway, I found two raw unencrypted HTTP requests, and sort of fixated myself on those two.
POST /uploadsj/rupio HTTP/1.1
User-Agent: Music Manager (1, 0, 12, 3443 - Windows)
Host: uploadsj.clients.google.com
Accept: /
Cookie: SID=[redacted] domain=.google.com path=/
Expect: None
Content-Length: 851
Content-Type: application/x-www-form-urlencoded
{“clientId”:”Jumper Uploader”,”createSessionRequest”:{“fields”:[{“inlined”:{“content”:”jumper-uploader-title-19Redacted”,”contentType”:”text/plain”,”name”:”title”}},
{“external”:{“filename”:”Redacted.mp3”,”name”:”C:\Users\Redacted.mp3”,”put”:{},”size”:610Redacted}},
{“inlined”:{“content”:”0”,”name”:”AlbumArtLength”}},
{“inlined”:{“content”:”0”,”name”:”AlbumArtStart”}},
{“inlined”:{“content”:”3rBe9dCa%c2tBeJdD”,”name”:”ClientId”}},
{“inlined”:{“content”:”00:1F:R3:DA:C7:ED”,”name”:”MachineIdentifier”}},
{“inlined”:{“content”:”5a5de21sd-54dsfe-Redacted”,”name”:”ServerId”}},
{“inlined”:{“content”:”true”,”name”:”SyncNow”}},
{“inlined”:{“content”:”153”,”name”:”TrackBitRate”}},
{“inlined”:{“content”:”false”,”name”:”TrackDoNotRematch”}}
]},”protocolVersion”:”0.8”} I noticed the second request was rather huge, 3556KB. Just enough to fit a normal-sized MP3. I knew what was in there. PUT /uploadsj/rupio?upload_id=REDACTED&file_id=000 HTTP/1.1
User-Agent: Music Manager (1, 0, 12, 3443 - Windows)
Host: uploadsj.clients.google.com
Accept: /
Cookie: SID=REDACTED domain=.google.com path=/
Content-Type: audio/mpeg
Expect: None
Content-Length: 3141REDACTED
ID3…..%vTENC….@..WXXX……..TIT2……. Redacted At this point, I was relatively ecstatic. Or at least, I will pretend that I was, because everything looked elegantly and remarkably simple. I had no idea where the upload_id came from, but I figured that it was part of the response from the first POST request. Part of the problem was that SmartSniff didn’t give me the actual responses to the HTTP requests, only the request data. Or at least from the five minutes that I bothered using it. The cookie looked like a generic cookie that would exist in a normal browser session.
Prototype
Since it used generic browser cookies, the simplest way to start would be to make a browser extension. Specifically, a Chrome App. That way, I could get the necessary permissions to do all the cross domain security protocol violations and probe around a bunch of requests. Since XHRs already include cookies for a specific domain, there’s nothing I need to do to set the cookies. I hoped and suspected that the User-Agent, Accept, and Expect headers were basically ignored, and the content-type would be rather trivial to set.
A lesson in premature optimization was the huge block of JSON which got sent with the first POST request. I had no idea what was really essential, so basically, I just deleted almost everything there except for what I thought might be really important: the file name and size. There were no errors in the POST request, so I figured it was okay to delete all of that stuff. I ran the POST and just as I suspected, the JSON that resulted included the upload_id, in fact, it included the entire PUT url, which was pretty nice.
{“sessionStatus”:{“state”:”OPEN”,”externalFieldTransfers”:[{“name”:”REDACTED.mp3”,”status”:”IN_PROGRESS”,”bytesTransferred”:0,”bytesTotal”:314REDACTED,”putInfo”:{“url”:”http://uploadsj.clients.google.com/uploadsj/rupio?upload_id=AEdREDACTED&file_id=000"},"content_type":"audio/mpeg"}],"upload_id":"AEdREDACTED"}} Then, when I executed the subsequent PUT request. I was scared. {“errorMessage”:{“reason”:”REQUEST_REJECTED”,”additionalInfo”:{“uploader_service.GoogleRupioAdditionalInfo”:{“completionInfo”:{“status”:”REJECTED”,”customerSpecificInfo”:{“ResponseCode”:404}},”requestRejectedInfo”:{“reasonDescription”:”agent_rejected”}}},”upload_id”:”AEdREDACTED”}} Scary. The rejection reason was “agent_rejected”, which made me think about the User-Agent header, and I wondered if that was supposed to matter. If that did matter, then I would have to prototype it in a different language since XMLHttpRequests forbid the setting of the User-Agent and other headers for security reasons (even operating in a privledged environment!).
But thankfully, before attempting the drastic route, I pasted back in the alleged cruft, the jumper-uploader-title, TrackDoNotRematch, TrackBitRate, SyncNow, ServerId, MachineIdentifier, ClientID, AlbumArtStart (hey that rhymes!), and AlbumArtLength. Magically now, it worked. Yay.
Rupio
During my quest to understand the bizarre agent_rejected error (because I totally fear rejection, they should have used a nicer word), I tried googling GoogleRupioAdditionalInfo. (I had googled “Rupio” before, since that was part of the POST url, but that didn’t yield any relevant results, it just ended up being a bunch of people’s names). Searching GoogleRupioAdditionalInfo yielded a more limited subset which happened to be more interesting.
The first result, from the SMEStorage Blog described an error emitted by the Google Docs platform. The next result was on the Picasa help forums, about “Upload video results in Error”. Then was a french language forum which mentioned an error which included GoogleRupioAdditionalInfo, this time on the url “upload.youtube.com”.
So, it seems “Rupio” is the codename (or just the name, but it’s much more fun imagining that there are subliminal codes everywhere) of a unified Google data upload/storage platform. That’s pretty cool. It probably makes sense that they have a sort of unified file storage system across Google Docs, Picasa, and Youtube, since it would probably be easier to maintain a system which is internally consistent. But to inject a sensationalist twist where occam’s razor shows that it’s not justified, this is a hint at an upcoming unified Google file storage service. A sort of file-browser dashboard which links all media and document files together in an accessible and uniform manner.
Shiny
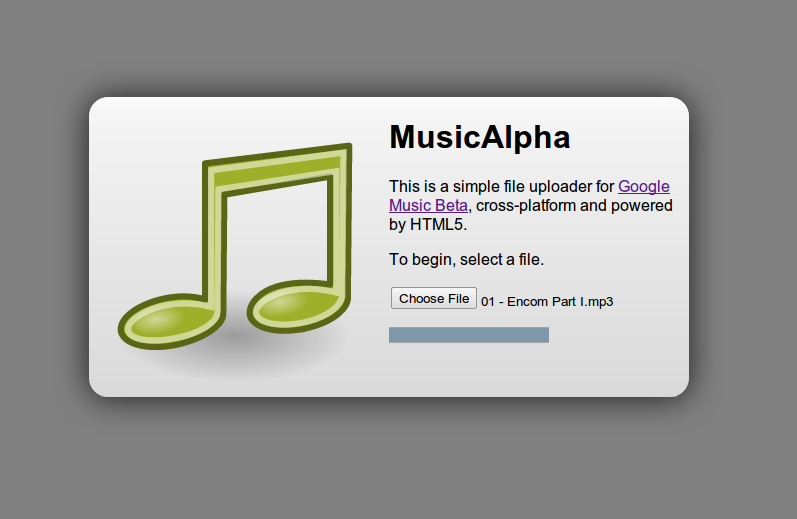
It worked. Or at least, it seemed to work. Vaguely. At this point, I was reasonably satisfied and began sculpting a nice pretty interface for it. Following my usual way, I just stole the Tango icon for an audio file mime type and built the entire interface around it. I remembered that earlier that day, I had discovered something called Layer Styles, which is a photoshop gradient/style clone that instead generates CSS3 gradients. I thought that was cool and I remembered it, so I played around with it and made a centered rectangle. Gray on Gray.
I decided on a name for it: MusicAlpha. It’s a sort of play on how this Google product features Beta in a way which is much more prominently than usual, with the gray “beta” the same size as the actual “music”. The Alpha sort of says something about how it will almost eternally be stuck in this unstable and incomplete form. It also reminded me of one of my favorite websites: wolfram alpha, and how the logo is stylized WolframAlpha or Wolfram|Alpha.
I wanted it to be minimal, but I’ve since adopted the belief that drag-and-drop file selection was only a fad. Sure, it’s often really useful, but it’s not great to restrict to that. A hybrid approach is much better, and if you have to have only one, then the standard browse button is better since you can drag and drop files to that button (on chrome, anyway) without any special code. Drag and Drop is often quite terrible on laptops, and I’m not sure if you can even drag and drop files with Chrome OS, since the file browser might be modal.
There’s not much to the interface, it’s probably as minimal as it can get. Two links, one to the service, the other to me. A button. That’s it.
Dismay
At some point in every good story (not implying that this is a good story), there’s false hope, where the protagonist (not implying that I’m the protagonist here, either) believes that he or she (not implying that I’m a she) is closer to the end than is factually warranted (I’m actually implying that that’s exactly what happened). I checked the Google Music song list, and lo and behold, the song was there.
Sort of. Not really. Something was. Not sure it was a song.

There was a blank row. Double click it, and something does play. And it is the song. But, there’s no way to seek because incidentally, it doesn’t know how long the track is, so there’s no way to render the position of the song.
It was late, and this was frustrating, so I just posted a terse blog post announcing the beginning of the project:
So pretty soon, I hacked together something that almost sort of worked, with one rather significant caveat: It doesn’t pick up any tag data, name, time, artist, album, etc. I can’t figure out why. I guess I’ll try some more tomorrow. And by the way, I totally lied. I didn’t try at all the next day.
Yesterday, that is, May 13th, the delightful Friday the Thirteenth, I tried again. I installed Music Manager on a VMWare installation of Windows XP, and sniffed the traffic with Wireshark running on the host computer. Didn’t notice anything new in the plethora of data which happened to get exchanged. I tried running smartsniff from the VM, but every time I tried to start sniffing, VMWare magically crashed.
SkyJam
At this point, I thought of looking at the MusicManager.exe binary. Usually, binaries have some random strings in them, which you can look at to give some hint at what it does, without actually decompiling something. I’m now going to proceed to anachronistically mention something about android, because of a certain URL that I find out later in this chronology: android.clients.google.com. So I used strings MusicManager.exe | grep android, and found some rather interesting things
2-.wireless_android_skyjam.CopyrightStatus.Type
2”.wireless_android_skyjam.ProductId
wireless_android_skyjam.Uits
Metadata.ParentalAdvisoryType There appears to be 214 mentions of the phrase “skyjam” in the executable, which I assume is not some new solar powered Google sandwich filling distribution mechanism powered by artificial intelligence driven aeronautically mobile condiment dispensers (obviously using Arduinos).
I have no idea what Skyjam is, but that’s totally a much cooler name than Google Music, regardless of how big you write “beta”. And what’s wireless_android_skyjam? Why is skyjam so deeply tied with wireless and android? Maybe it’s got something to do with flying robot sandwich machines. Or not.
Maybe it has something to do with that Simplify Media company which Google bought last year. Or maybe I’m just a little sad that the product ended. According to TechCrunch,
Google VP Vic Gundotra said that Simplify’s technology will be used to offer a desktop app that will give you access to all of your (DRM-free) media on your Android devices remotely, using Google’s new iTunes competitor on the web.
> Desktop App: Check. Android: Check. New iTunes Competitor on the Web: Check. Simplify’s Technology: Not so much.
For those who aren’t familiar with what Simplify did (which I assume is nigh everyone), it streamed your music by making your desktop into something of a server, so your huge cache of music can be accessible by any mobile device remotely.
Fishtank
I had a random false lead. I thought that the server still read ID3 data on itself, and noticed that the HTTP dump was somehow slightly different from the original file. It was the same length. The exact same length, but some of the bytes were different. Most were the same, and they were all in the same place, but for example, all 0x00’s seemed to have been swapped with 0xe4’s. Some other bytes were also different, and in retrospect this was probably because the program which created the http dump sucked and encoded all the bytes wrong or something. But I tried opening it up in Ghex and I swapped every 0xe4 with a 0x00, and magically the broken file now played, with one exception: the audio now sounded like a fishtank. It’s like everything’s just water, magestically moving around with exquisite sublimity.
Sniffing
I borrowed another Windows computer this time, and tried again. This time, I also tried the HTTP Proxy called Fiddler, which seemed to be able to capture more information, or at least give me more of the information that I would find useful and less of what I wouldn’t find useful. I noticed that for every file which was uploaded, there were in fact three requests, not two as I had previously observed.
So where had this covert HTTP request been hiding? Behind in the magical realm of HTTPS/TLS encryption. I couldn’t peek into the actual content of the HTTPS requests because of the fact it was encrypted. And as the strings command had revealed earlier, there was a huge block of base64 encoded text which appeared to look like a sort of public key. It suddenly connected, the Music Manager probably has its own list of trusted certificate authorities, and that’s why adding a mere certificate to Windows wouldn’t do a thing.
But the unencrypted CONNECT request, which initiates a HTTPS connection said enough.
There was a request to android.clients.google.com and it was encoded with gasp: application/x-protobufs. If this was some sort of action movie, here would be the scene where the antagonist from the previous movie reveals that he is still alive (with some facial scarring) and the person responsible for all the disappearing bodies (of data).
I was about to give up at this point, but then a new idea sturck.
A New Hope
This is the second movie-title article sub-title that I’m aware of, unless there’s a movie called “Packet Sniffing”. For the prospective filmmaker, this is when the protagonist has the flashback and remembers that time, long long ago (though here it’s only like four days, you can take creative liberties), when refining the art of hackery, a task involved crafting an implementation of a storage system from the web interface of a specific cloud drive service.
So, I noticed that I had spent so much time exploring what enigma lay beyond the surface of Google Music, that I totally forgot to actually use the service. And when I did, I realized that there was an Edit Song Info context button. Trying the feature out, it seems to be a simple JSON post to a certain modifyentries URL.
{“entries”:[{“genre”:”REDACTED”,“beatsPerMinute”:0,“albumArtistNorm”:””,“album”:”REDACTED”,“artistNorm”:””,“lastPlayed”:1305419744984200,“durationMillis”:192168,“url”:””,“id”:”564ads4f8e4-REDACTED”,“composer”:””,“creationDate”:130541974874500,“title”:”REDACTED”,“albumArtist”:”REDACTED”,“playCount”:0,“name”:”REDACTED”,“artist”:”REDACTED”,“titleNorm”:””,“rating”:0,“comment”:”REDACTED”,“albumNorm”:””,“year”:”2004”,“track”:”04”,“totalTracks”:””,“disc”:””,“totalDiscs”:””}]}Amazing. I just stumbled on the magical code which would allow me to finish the project. Yay. Now I had to figure out what the xt= parameter means (after determining it’s necessity). My first hunch was to search the HTML source of the page, because the magical access codes for Amazon Cloud Drive were put inside a hidden input element. But no, it wasn’t there. Now the fear starts settling in, what if it’s a strategically computed magical super string? But why would they ever do that?
Somehow I noticed somewhere on every time the page is loaded, the network logs indicate a Set-Cookie: xt=AM-REDACTED. Now I knew how to get it: Just send an XHR to the cloud player and copy the cookie.
ServerID
Now, the important pat of all the items in the entries object is probably the id. Everything else seems somewhat generic, and probably exists for any song that you throw at the service, but id clearly has a definite, important, non-random, predetermined value. I thought that there was no correlation between the data passed from the uploaded data and the id which was here, since the upload_id was way too long and had nothing in common with this song id.
Since the songs that get uploaded have no title, they always appear first on the alphabetical list of songs, so I figured I would just pull a list of the songs, alphabetically, and then take the first one to get the ID. Then I discovered the auto-playlists, which included one for most recently added.
Unless you have the power of omniscience, you don’t know that the format of the IDs here were like das8f7-adf0w8f-adf87we-mwere, because I slapped a huge REDACTED on the latter half. The random string generating code that I’ve used for years out of convenience is Math.random().toString(36).substr(2), which basically generates a random float, converts the fractional part to base 36 (0-9 a-z) and strips the leading “0.” from the string. This incidentally ends up being quite short (especially on chrome, it’s much longer on firefox), and lacks the dashes.
So I looked at the ID for one of the streams and noticed that the id string was unusually short. I started wondering why something like that would happen, and then it struck me, not quite like lightning because I’m still alive (though whether or not I am when you’re reading this is a totally different question). This file ID was the same thing as the ServerID which I thought was just a random useless value that was arbitrarily required for it to work. I deleted the whole getRecent routine and suddenly everything started to make sense.
Fish
You probably don’t remember my old blog post, almost a year ago, titled A Bright Coloured Fish: Parsing ID3v2 Tags in Javascript and ExtensionFM. Recently, by fate, I happen to have used that code more times that I’m comfortable with, and it seems that once again I must revive this old memory. It’s fairly outdated, and some things are very nasty. Not being able to parse ID3v1 is pretty terrible, though I don’t think I have any songs using v1.
I hoped that Google’s magical server farm would have parsed out the ID3 data, but that doesn’t seem to be the case. I have to manually parse them in the client.
I had to change the id3v2 library a slight bit: the picture parsing code now includes a blob attribute, since the the album art must be uploaded to Google’s servers in order to be included in the metadata.
I guess that fishtank sound was an omen. I’m sure the prospective filmmaker could use it in some way like this.
Time
Rather auspiciously, the modifyentries command included durationMillis. Since it became evident that the music player app had no way of knowing the length of a song without some tag data, that it would be impossible to seek to a certain portion of the song without this ability, it was really important. But since this was from the API for a user-facing operation, and editing the length of a song isn’t something that a user can or should be able to edit, it was pretty fortunate that that was included as part of the API.
This wasn’t without problems though. It’s not that easy to measure the length of a song. The Length tag of a MP3 file is actually seldom included, so that clearly can’t work. I looked at how to measure the length, and it was pretty scary, since it doesn’t seem like there’s any way other than parsing all the frames out and multiplying the bitrates.
But this time, HTML5 comes to the rescue. I never thought I would be so happy to use . I just take the file, convert it to a blob URL through that nest of if/else statements that handles different versions of chrome. I open it with new Audio and wait for the metadata event, indicating that I now know the length of the song to thirteen places after the decimal. Because of course, I would hate to miss the last picosecond of my song.
I felt sad for the little femtoseconds and attoseconds who were neglected by Google when they decided that the song lengths should be milliseconds. Not quantized divisions of Planck time.
Epilogue
At this point, nothing interesting really happened. I fixed up the interface, added queueing, and other insignificant things. I published it and spent the rest of day writing a hopelessly long document describing it.
Protocol
For those who want to build their own programs which upload to Google Music, I guess I’ll write a summary of how it works.
- Get Song Metadata (ID3 data, Duration, primarily)
- Login to Google
- POST to uploadsj.clients.google.com/uploadsj/rupio
- PUT to putUrl as part of the response of previous operation
- Load music.google.com/music/listen and capture xt value from Set-Cookie response header
- (Optional) Upload Album Art to music.google.com/music/services/imageupload?u=0&xt=
- Set file metadata via music.google.com/music/services/modifyentries?u=0&xt=
Friendly Reminder
To get the app described in this lengthy narrative, click here.